A few weeks or so ago I was browsing online and came across a site that I have fallen in love with. It's is called Our Best Bites. It is run by a couple of ladies and I promise if you spend 5 minutes there you will be in love too!
I came across this unique idea for dying eggs using silk ties. The eggs turned out AMAZING and I knew this was something I would have to duplicate. When I read the instructions I was incredibly relieved to find out just how easy and kid friendly this would be. You can read the blog on the website here and I will share my families experience as well.
What you need:
Raw Eggs
A (non-aluminum) Pot
Pieces of Silk large enough to cover an egg (tie, scarf, etc.)
Pieces of Old Fabric large enough to cover an egg (pillow case, sheet, etc.)
String
Vinegar
Vegetable Oil
We didn't have anything silk at the house so the boys and I loaded up and made a trip to the local Goodwill store. They had quite a few ties to choose from and they ranged from $0.99 to $3.00. We picked out 4 and I tried to make sure we had a range of colors. We also picked up a white cotton pillow case for $1.00. I took them home, washed them and used my seam ripper to open up the ties and remove any tags or other material.
Next, we cut up our ties into pieces large enough to wrap around our eggs.
After that we decided what part of our tie we want printed on the egg. It wouldn't be a bad idea, if you have a tie with an odd design, to figure out what you want on your egg and then cut the fabric with it centered around the design. Once you have your egg placed over the design you want transferred then wrap the fabric tightly around the egg. I pulled up the two sides followed by the two ends like you would a bindle. Then you take your string, I used a white cotton yarn, and tie it around the top of the silk tie tightly. 

Getting their eggs just right!
Our little egg pouches:
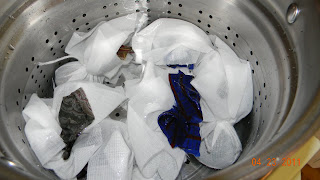
I didn't get a picture of the next step but basically you do the same thing again wrapping the eggs in a plain fabric and tying them up tight. Put the eggs in a pot and add enough water to cover the eggs.
After that add your "Magic Potion" (4 TBS white vinegar), put your pot on the stove and boil. Once your water gets to a good boil, turn the heat down and simmer 20 minutes. When time is up, remove the egg pouches and let cool. When you are able to hold them without losing your fingerprints open up those little bundles and check out the eggs.
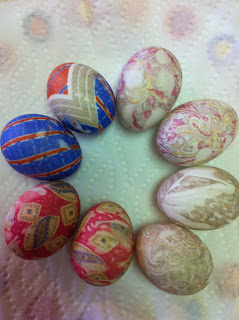
Final Results:
Mine :)
Braxton's
He wanted a diagonal line on one and to make sure the "V" showed up on the other. I think he did a great job!
Rogan's
He wanted the tie with the "eyeballs".
Parker's
His didn't turn out quite as well but I love the textured look his eggs have.
This was a really fun and simple craft to do with little hands. Not too mention, NO DYE!!! We learned the darker the print or the busier the pattern makes a better egg. I think that next year we will have a contest to see who can pick the best fabric and make the best egg. I am going to have to start hitting the thrift stores now to get ahead of the competition!
I See You. You Matter.
8 years ago


0 comments:
Post a Comment